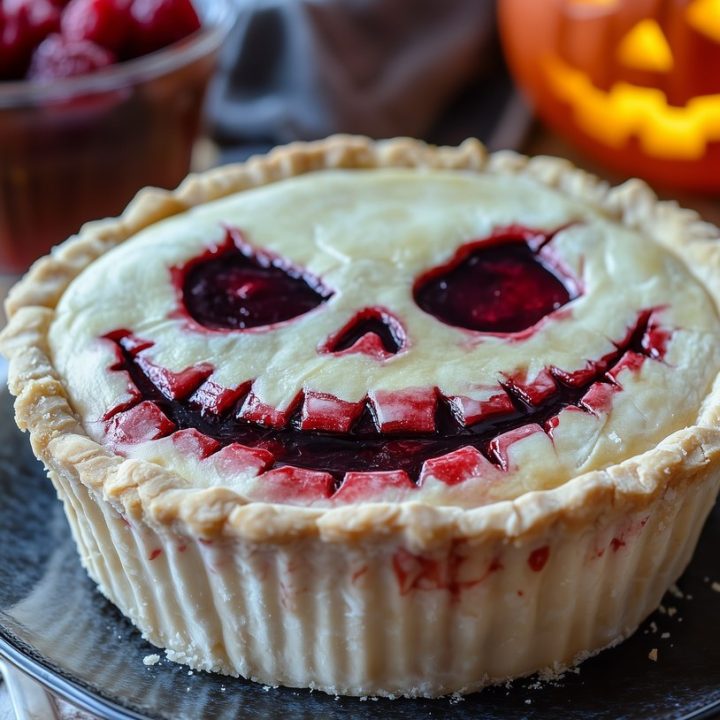
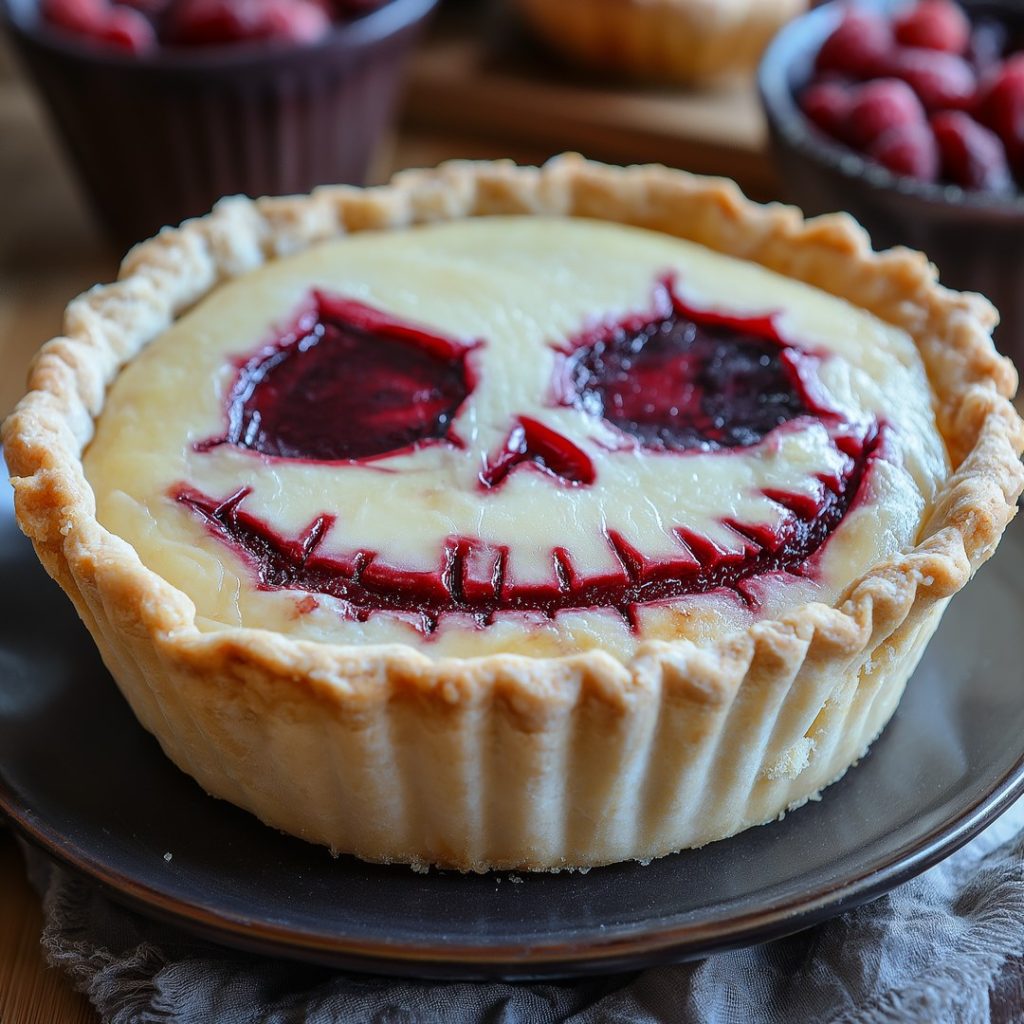
This Halloween, make a statement with a spooky “Scream” Raspberry Pie! The deep red raspberry filling contrasts perfectly with the eerie, carved “Scream” face crust, making this pie an eye-catching addition to any Halloween spread. Not only does it look spooky, but the raspberry filling adds a deliciously tart flavor that pairs perfectly with the flaky pie crust. Follow these simple steps to bring a touch of fright to your Halloween dessert table!

Spooky Halloween Scream Raspberry Pie Recipe
A spooky Halloween Scream Raspberry Pie with a vibrant red filling and a “Scream” face crust—perfect for a gruesomely delicious dessert on Halloween night! Simple to make and so fun to share!
Ingredients
- 2 cups all-purpose flour
- 1/2 tsp salt
- 2/3 cup shortening or lard
- 1/4 cup cold water
- 5 cups fresh or frozen raspberries (do not thaw if using frozen)
- 2/3 cup granulated sugar
- 4 tbsp cornstarch or flour (for thickening)
- 1 tbsp cinnamon-sugar mixture (for sprinkling on crust)
Instructions
Step 1: Preheat the Oven
- Preheat your oven to 425°F (220°C).
Step 2: Prepare the Pie Crust
- Mix Dry Ingredients: Sift the flour and salt into a large bowl.
- Cut in Shortening: Using a pastry cutter, cut the shortening into the flour until the mixture resembles coarse crumbs.
- Add Water: Sprinkle in water, a teaspoon at a time, mixing lightly with a fork until the dough holds together.
- Form the Dough: Press the mixture into a ball, then divide it into two equal balls—one for the bottom crust and one for the decorative top crust.
Step 3: Roll Out the Crusts
- Bottom Crust: On a lightly floured surface, roll out one dough ball into a circle large enough to fit a 9-inch pie plate. Transfer it to the pie plate and trim the edges.
- Top Crust with “Scream” Face: Roll out the second dough ball on a piece of parchment paper. Using a “Scream” face template (like a pumpkin carving stencil), carefully cut out the eyes, nose, and mouth shapes. Set the top crust aside.
Step 4: Prepare the Raspberry Filling
- Combine Ingredients: In a large mixing bowl, gently combine the raspberries, sugar, and cornstarch or flour. If using frozen raspberries, do not let them thaw before mixing.
- Add Filling to Pie: Spoon the raspberry filling into the prepared pie crust in the pie plate.
Step 5: Add the Decorative “Scream” Face Top Crust
- Position the Top Crust: Using the parchment paper, carefully flip the “Scream” face crust over the raspberry filling so the cut-out face is centered.
- Seal the Edges: Press the edges of the top crust gently against the bottom crust to seal. Trim any excess dough.
- Sprinkle with Cinnamon-Sugar: Generously sprinkle the top of the pie with a cinnamon-sugar mixture for extra flavor and a spooky effect.
Step 6: Bake the Pie
- Initial Bake: Place the pie in the preheated oven and bake for 20 minutes at 425°F.
- Lower Temperature: After 20 minutes, place a cookie sheet on the rack below the pie to catch any potential drips, and reduce the oven temperature to 350°F (175°C). Continue baking for an additional 25-30 minutes until the crust is golden brown and the filling bubbles through the cut-outs.
- Cool the Pie: Remove from the oven and let the pie cool on a wire rack for 3-5 hours to allow the filling to set.
Step 7: Serve
- Serve your spooky pie with a scoop of vanilla ice cream for a creamy, cool contrast to the tart raspberry filling. Enjoy your ghoulish creation!
FAQs
Can I use frozen raspberries for this recipe?
Yes! If using frozen raspberries, add them directly to the filling without thawing to prevent excess liquid and a runny filling.
How can I prevent the pie from being too runny?
The key to preventing a runny pie is to prepare the filling just before adding it to the crust and to allow the pie to set for at least 3-5 hours after baking.
Do I need a specific template for the “Scream” face?
No, you can find any “Scream” face or spooky face pumpkin-carving template online. Just print it out, cut out the shapes, and use it to trace and cut the shapes onto the pie crust.